In Part 2 of our series on Tag Management we went through the keys and major questions to ask when undergoing a Tag Audit.
Now that we have a good understanding of what is going on with the tags currently on the site, it’s time to define what should be happening and develop a plan to get there. In Part 3 we will break down the steps to developing this Tag Policy and what kind of information needs to be documented to go into it.
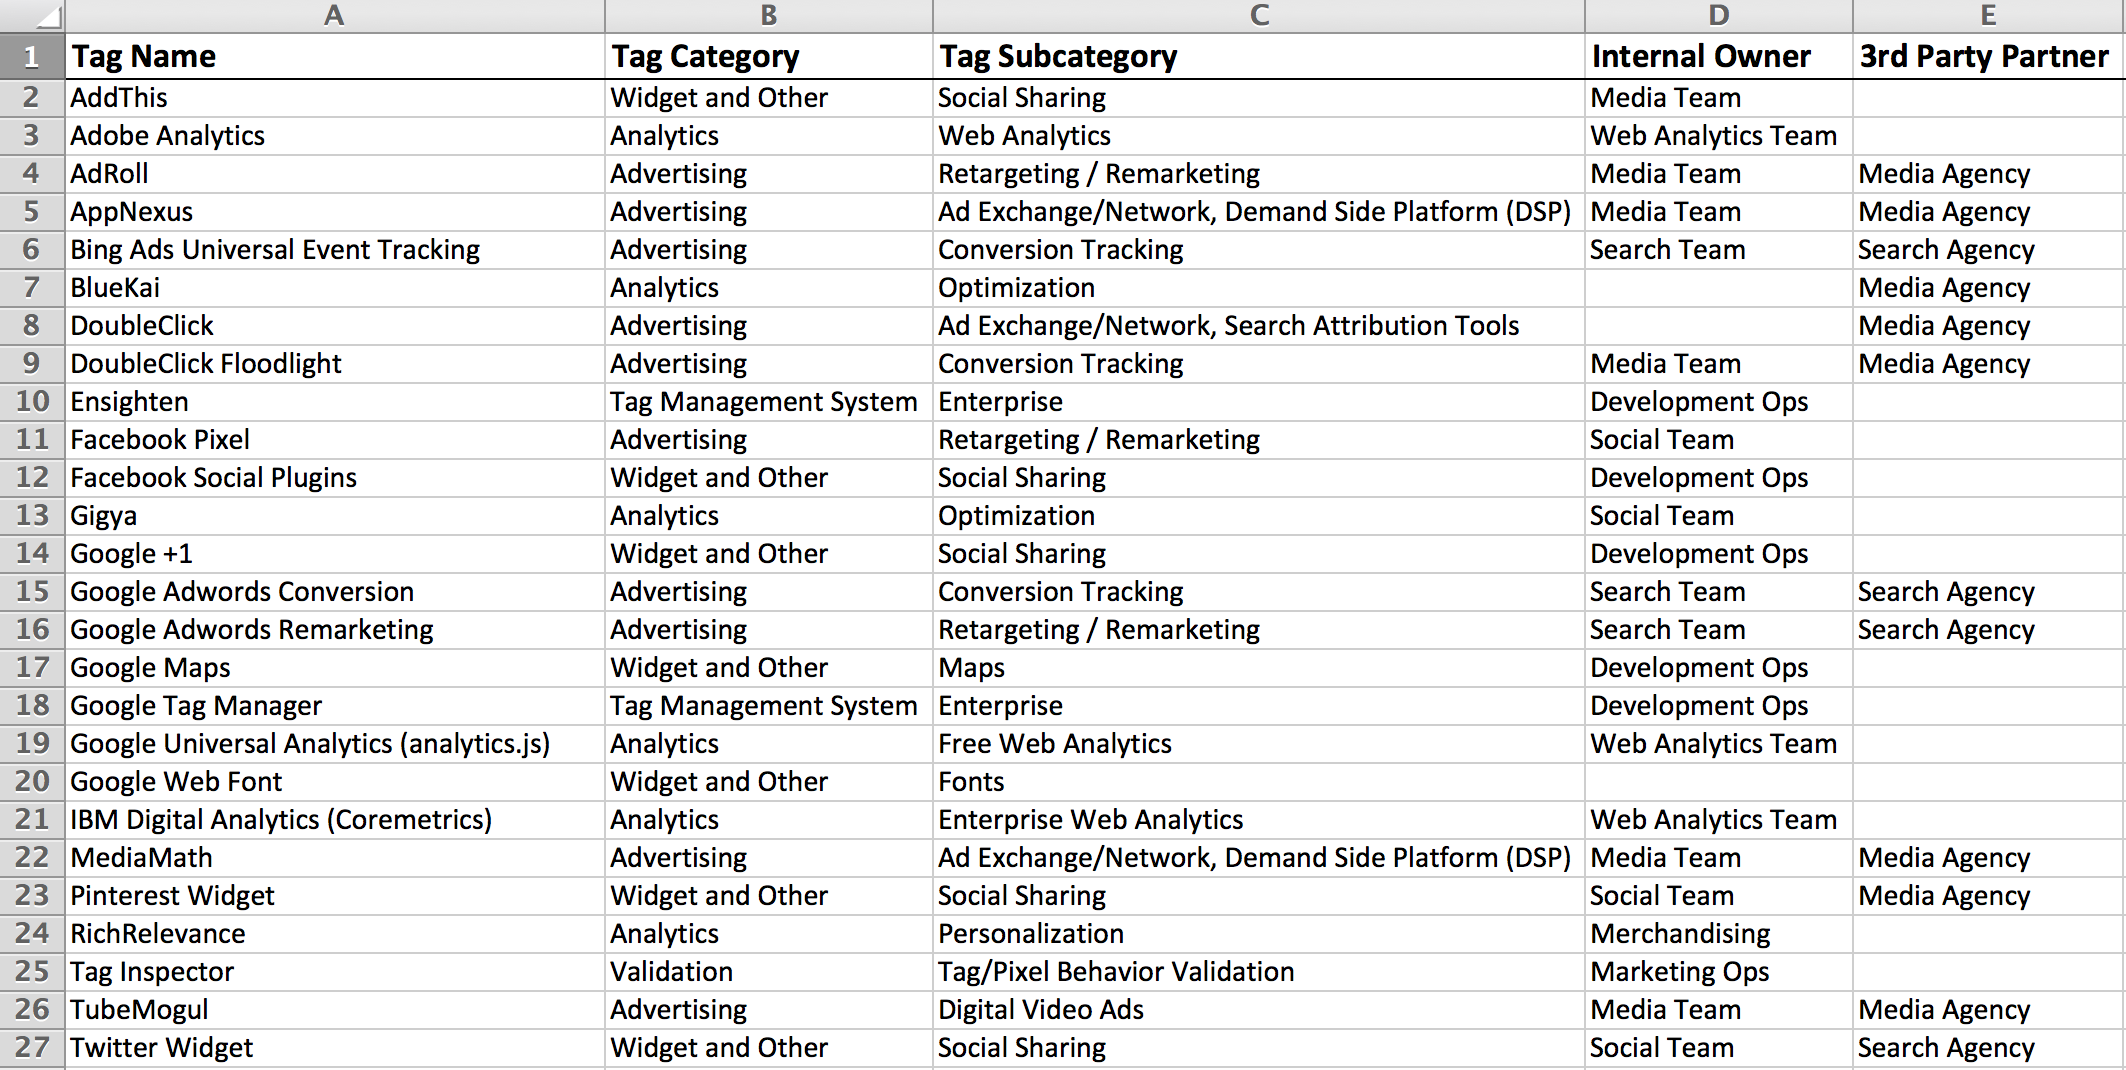
Step One – Identify What Tags/Pixels Need to Stay and What Needs to Go
Here we list out all tags found in the tag audit and inventory. It helps as well to define who internally owns each platform, list the function of each tag, and identify if each is associated with a particular 3rd party partner.
Once the list is created, the real work comes in. In many cases a lot of the platforms on the site no one will know what they are or who owns them. Here, it is extremely helpful to focus primarily on the tags that you control. That is, the tags loading either directly from the source code, or loading directly through your tag management system.
A quick example. Using Tag Inspector’s Hierarchy feature, we can see how all tags are loading. The tags on the first level are those loading from the source code, the ones connected directly to the TMS are loading through the Tag Management System.
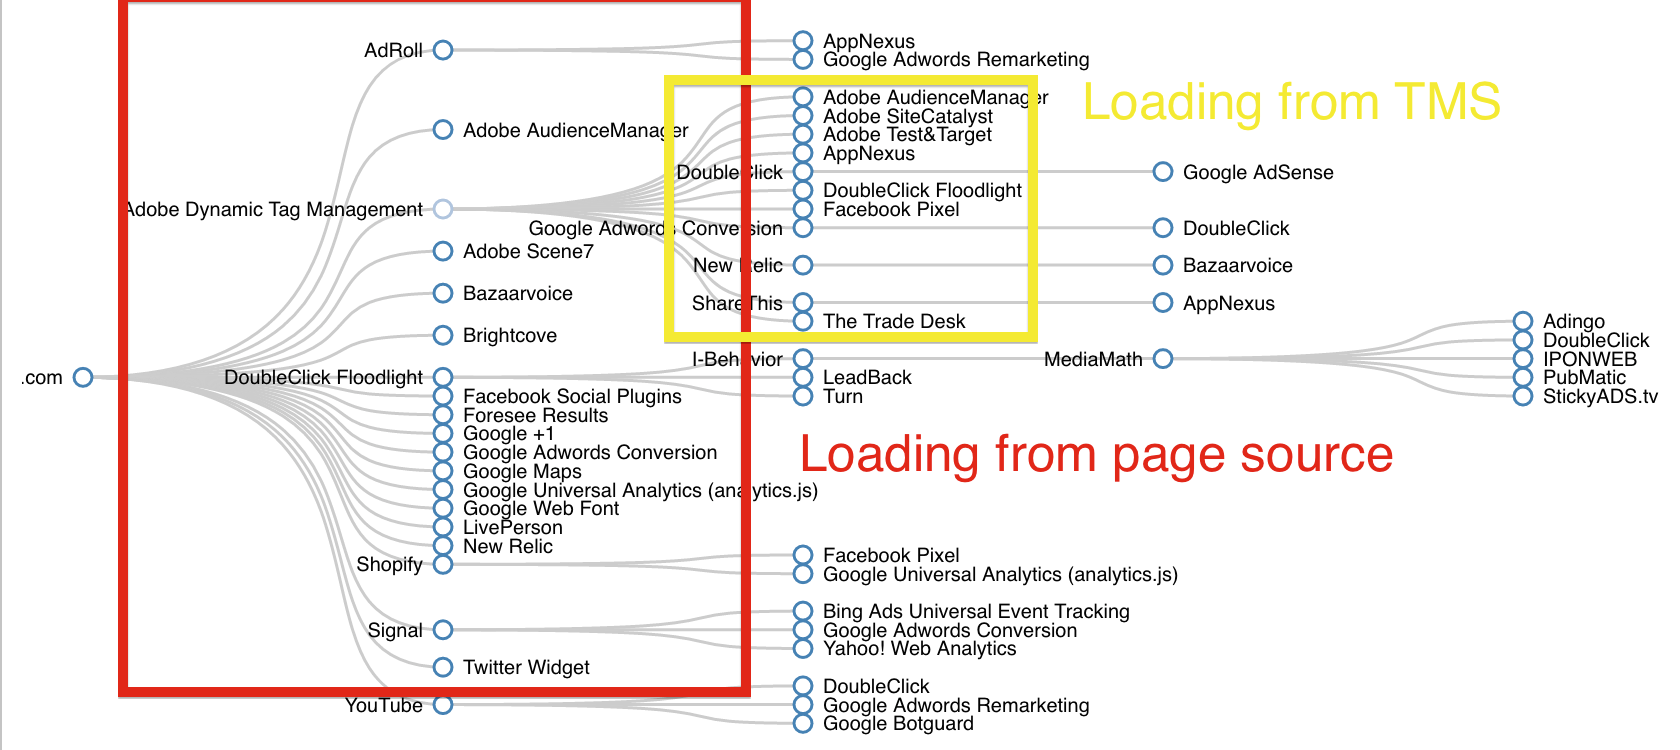
All the other tags are piggybacking third-party tags. Many piggybacking tags you have no visibility into without undergoing the Tag Audit process. One other note about these third-party tags. It is always a good idea to go back and review the data sharing agreements with the platforms that are loading them in to determine if they are allowed or not. We discussed these “zombie tags” in a previous post and will revisit some of their implications in a future post as well.
By just focusing on the tags/pixels that you directly control, it is much easier to start paring down the full list.
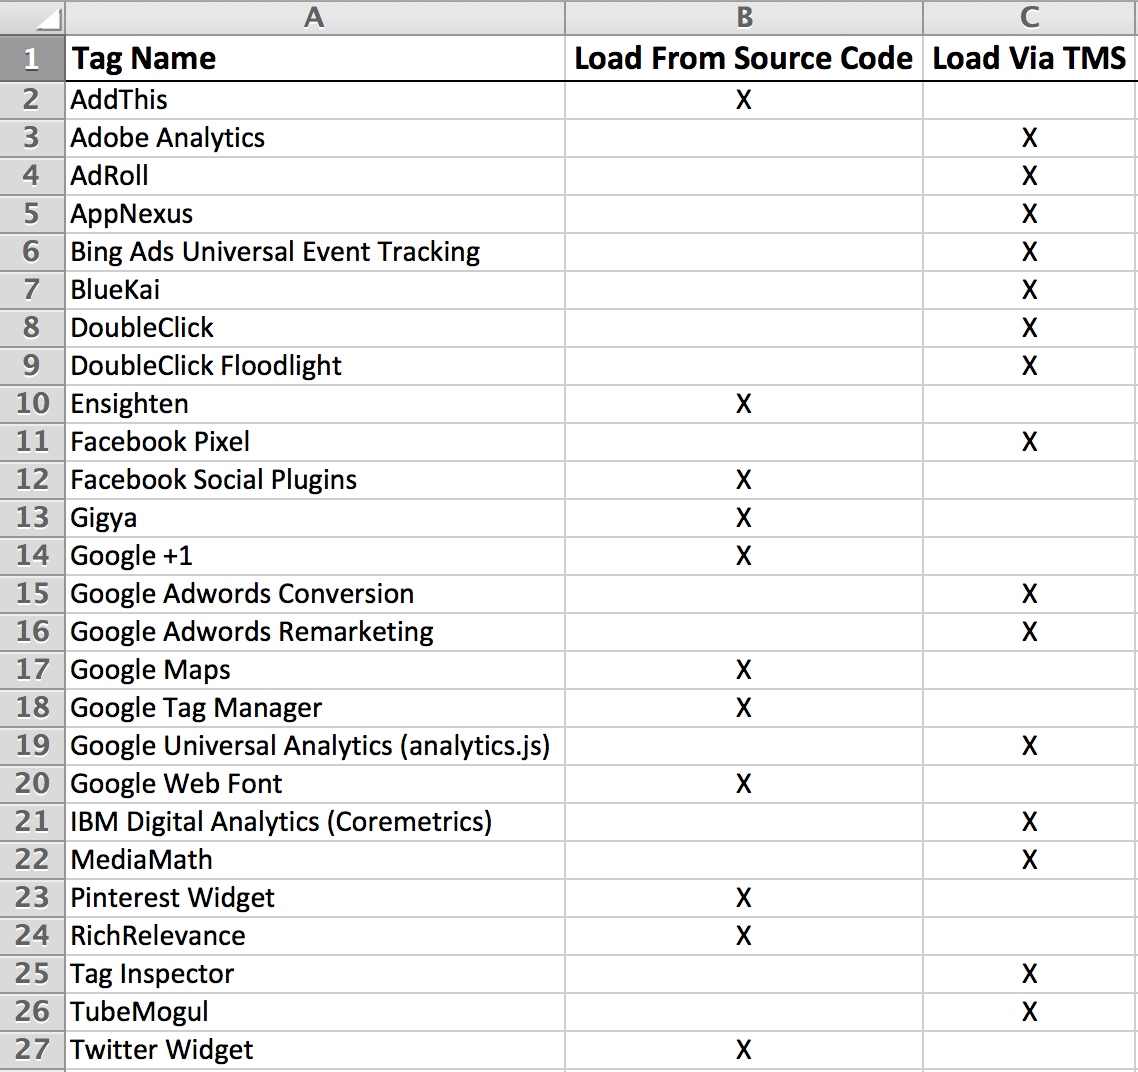
Step Two – Define Tag Loading Requirements
Now we have a full list of the tags that need to stay and those that need to be removed from the site. It is now time to evaluate how tags should be loading. That is, define which tags are currently being loaded from the page source and should be migrated to the Tag Management System?
The general rule of thumb is any tags that load synchronously on the page and any tags that effect some sort of on-screen element visible to the user should be loaded from the page. Any other tags/pixels (analytics, conversion tags, remarketing tags, etc.) should really be managed through the TMS. The benefits of this are many, from the central data layer being able to standardize the back-end data to easier management, they need to be centrally managed. (We’ll expand on this in a future post).
Once these tags are marked for migration to the TMS, you will need to gather the implementation guides and define the data requirements for each platform. From there you can put a plan in place for removal from the source code and implementation in the TMS. Also needed in this process is a list of data attributes that need to be added to the data layer to feed into the respective platform.
Alright! We’re getting there!
Step Three – Define Data and Coverage Requirements For Each Tag
We now have documentation for the tags that are allowed and the tags/pixels that need to be loading from the source code vs. from the TMS. It’s time to start defining requirements for each tag. This comes down to where each tag should be (all pages, confirmation, product display, etc.) and what data should be collected within each.
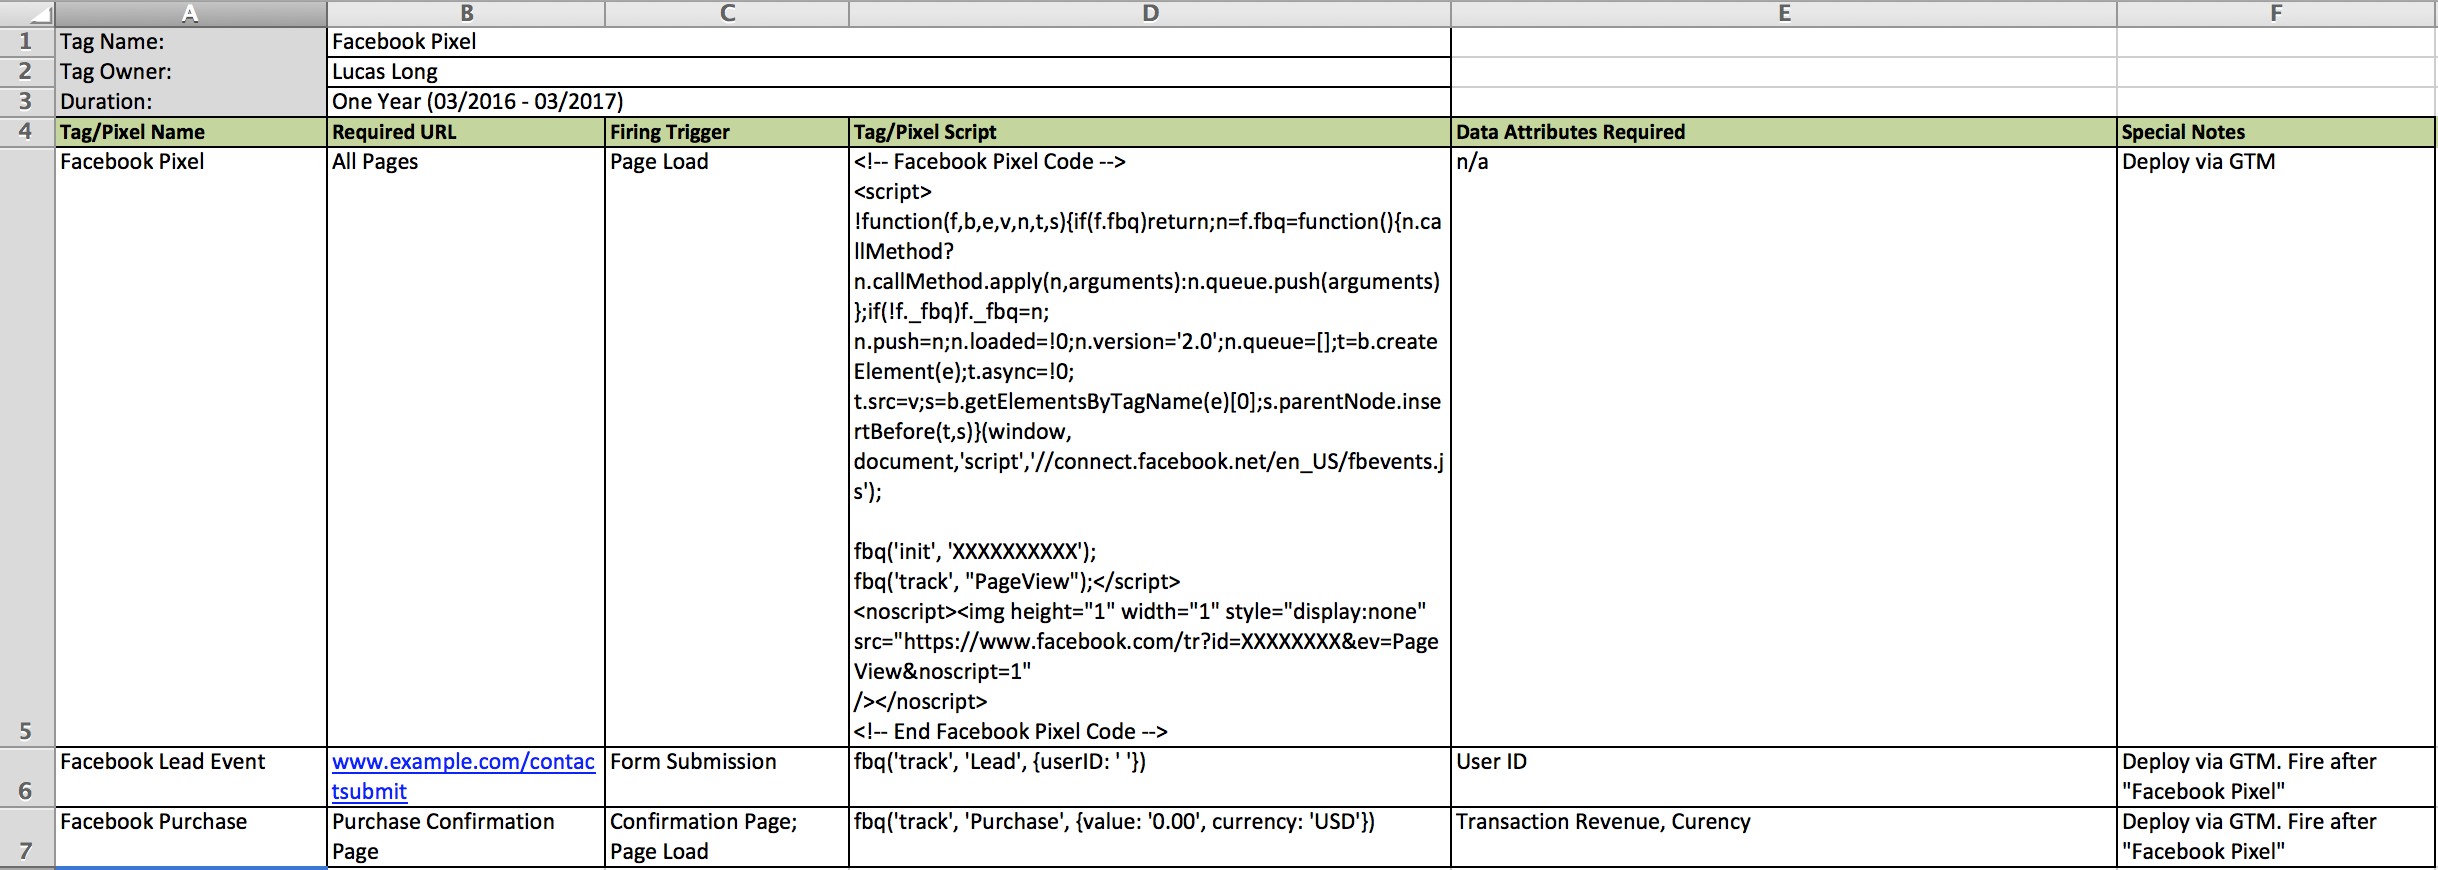
The cleanest way to do this is on a tag by tag basis and then link the full tag requirements back to the overall Tag Policy. It is these requirements that will form the basis for ongoing maintenance and validation.
Here’s a simplified example of what a tag detail document could look like for a Facebook Pixel:
Now we just need to link it all together and central tag/pixel governance documentation is finally realized!
Seem difficult? We can always help with the process. Feel free to contact us here and we will walk you through it all.
Ok, now we have all the tags on the site cleaned up, documented, and everything is in order! Well done! The next step is making sure it stays that way. For this, you will need to institute a proactive Tag Monitoring and Validation process. But don’t worry, I’ll walk you through that process as well!
Check out the next part in the series as we take a deep dive into the QA, maintenance, and ongoing monitoring process here!
To read the full Tag Management Master Guide, click here!
