We left off our Master Guide to Tag Management Series with Part 3, where we discussed the creation of a Tag Policy. A Tag Policy is extremely valuable for a number of reasons: From governance to defining data requirements for ongoing tag monitoring, to helping with the migration of tags to a Tag Management System. It is this last aspect that we will cover here in Part 4.
Having a solid Tag Management System and a defined process for implementing, managing, and monitoring tags can greatly simplify a lot of things as you work to enhance digital analytics efforts as well as general performance on your website. A few of the major advantages to using a TMS are the ability to manage all of your tracking tags in one place, the leveraging of a central data layer to keep a standard data structure to help with backend integrations, and the seamless addition and removal of tags. In the dynamic marketing space, all of these are a must. Add in the fact that IT resources don’t have to be leveraged nearly as much and it’s a win-win for many parts of an organization.
Now, we can wax poetic about Tag Management Systems in general for hours, but the first hurdle that you have to cross to reach tag management bliss with a TMS is getting all of your site tags there in the first place.
For this, it is going to take some organization, a vision for the final tag landscape, understanding the limitations of the TMS, and also a great plan. If you are following along though, the groundwork for this plan has already been laid in your creation of a Tag Inventory and Tag Policy.
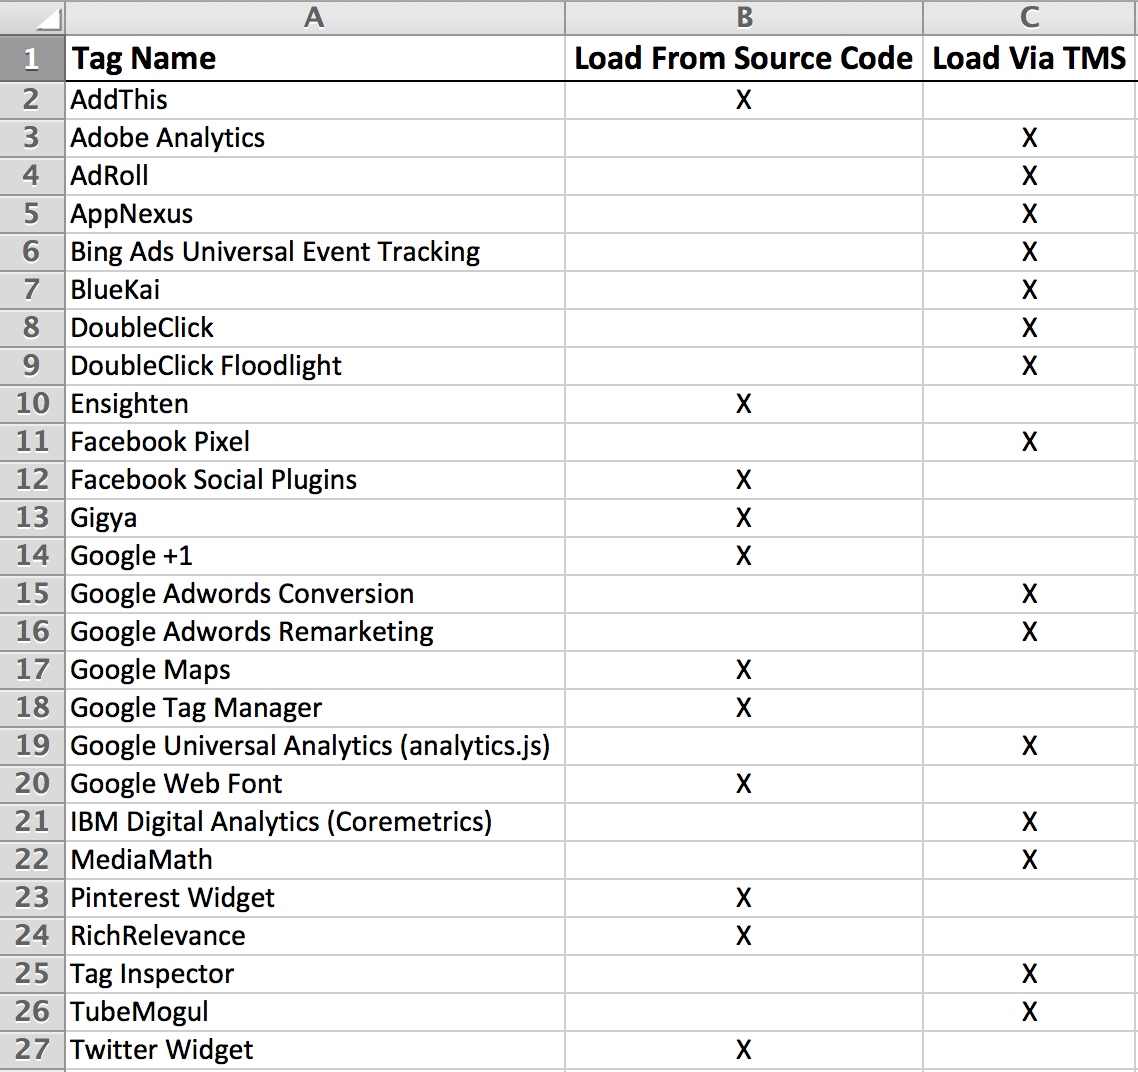
The Inventory that we covered in Part 2 of our series allows visibility into the overall landscape of your website and informs the Tag Policy. As part of the Tag Policy, you have determined which tags should be loading via the Tag Management System, and which still need to be deployed via the page source.
Determining how each tag should load will depend some on the TMS that you have chosen. The primary enterprise TMS platforms are Ensighten, Google’s GTM, Tealium, Signal, and Adobe’s DTM. We will further discuss some of the differences between the major players in a future installment, but if you are curious about learning more in the meantime you can check out my colleague Andy Gibson’s interviews with a few of them from last year here, here, and here.
Some of these platforms are built to enable the deployment of tags that load both synchronously and asynchronously. Essentially, synchronous tags will block other page elements from loading and asynchronous tags load independently in the background. How a tag behaves is largely dependent upon its function and if it is inserting or changing content on the page. Most analytics tags load asynchronously as they are passively collecting data and sending it back up to the respective platform. A general rule of thumb is to load all asynchronous tags via the TMS and the synchronous tags via the page itself.
Once you are able to determine which tags should be loading via the TMS, the next step is to determine where each should be loading and what the data requirements are.
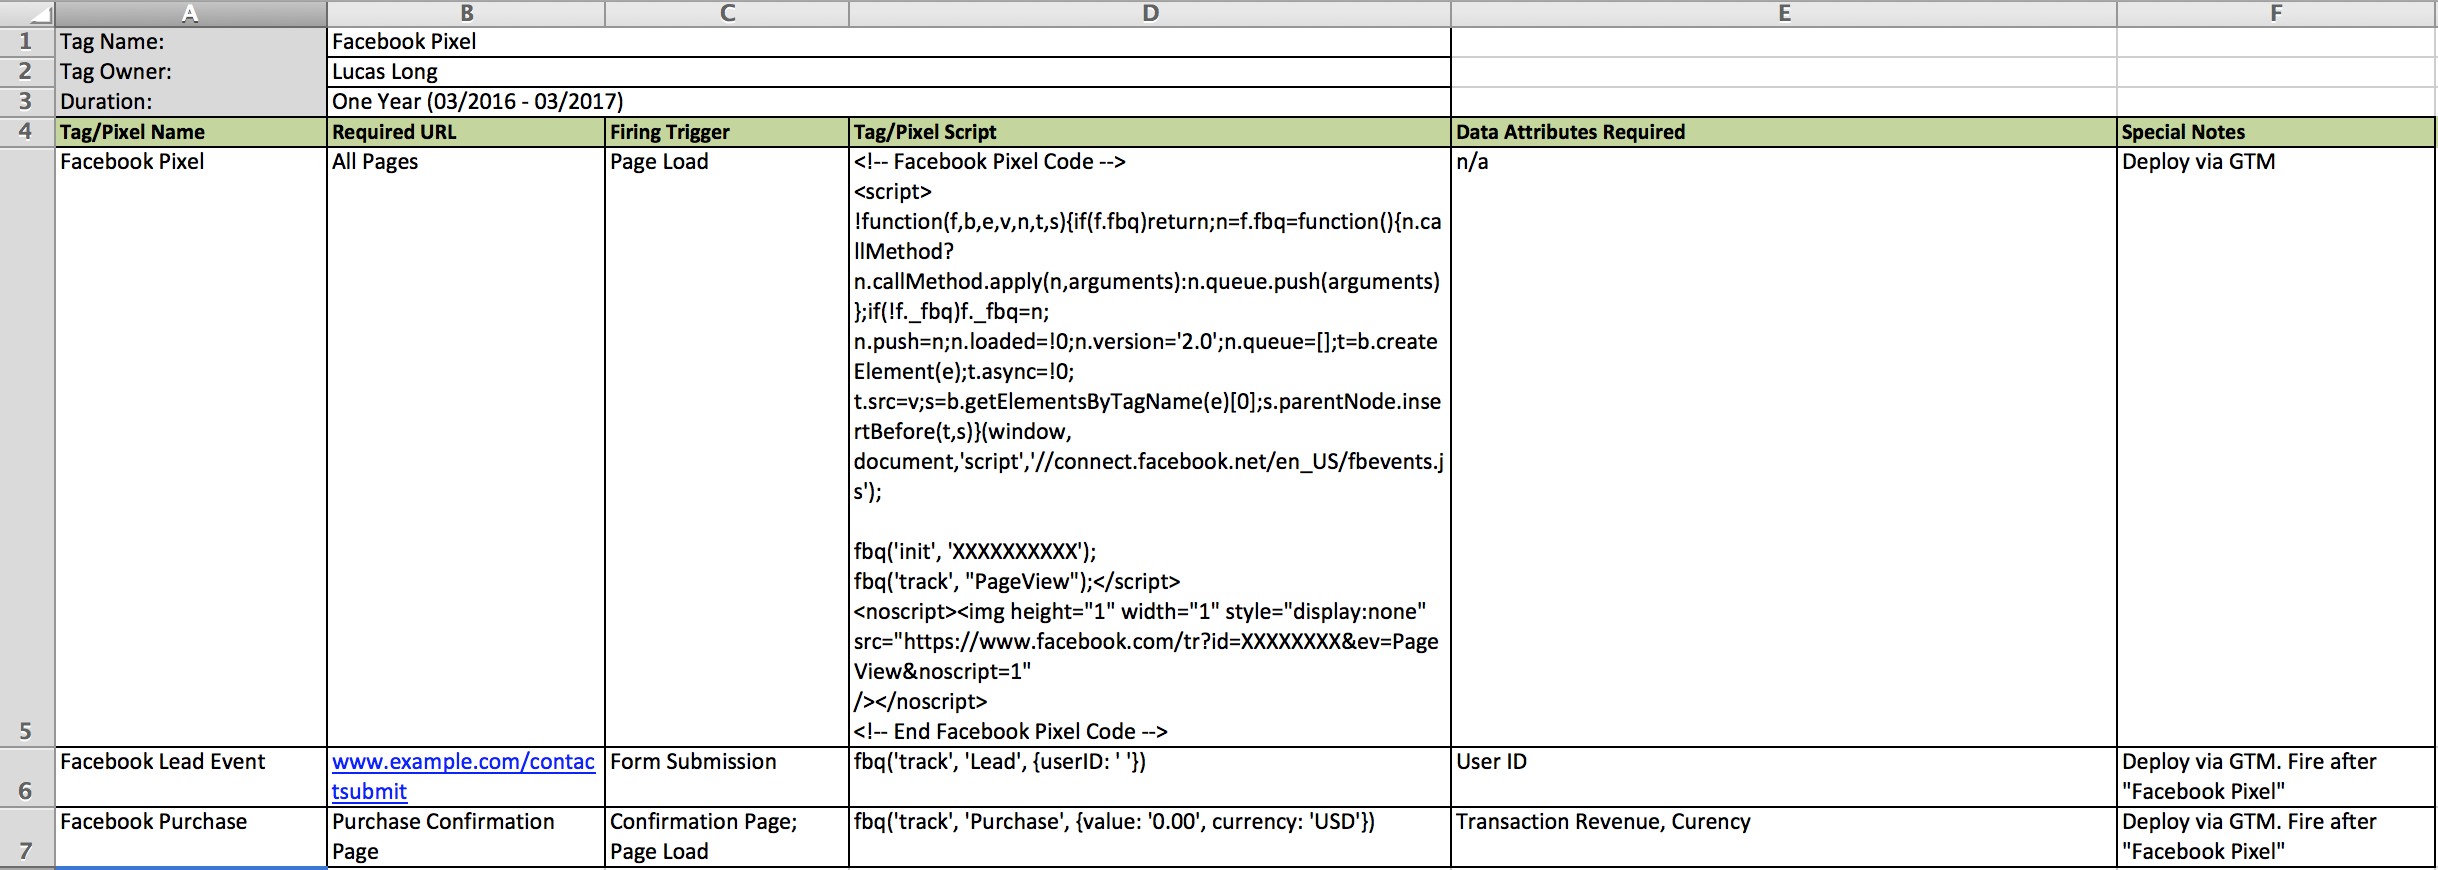
Documentation of the data requirements is imperative at this point. Lucky for you, since you followed our guide for creating a Tag Policy, this is also already completed!
Documenting all data requirements and creating a comprehensive list of what is needed for each tag feeds into defining what is needed in your data layer.
The data layer is a massively valuable aspect of implementing a Tag Management System and migrating tags into it. Now, you may be asking “What is a data layer?” and to that, I will answer: “It is the greatest thing created for easily implementing new tags and getting enhanced analytics capabilities in each.”
Essentially, the data layer is one central place where all the information needed by each tag is placed in an organized fashion. Think of it as a toolbox where all the different tools you need to build an incredible, digital data-driven organization live.
The technical aspects of how to get this data into the data layer are way out of the scope of this overview but the structure and “how to” is outlined in most implementation guides available via your TMS of choice. A big part of the organization of this will depend upon the primary web analytics platform, as well. Google likes it structured in one way, Adobe in another, etc.
So now you have your list of tags to migrate, the requirements for the data layer and the implementation of the TMS snippet and data layer are underway by the IT group. What next?
Here is where the documentation for each tag covered in the Tag Policy comes in handy again!
In the policy, you have compiled the implementation requirements for each tag. The next step is to configure the TMS and set up each tag within it based on the implementation requirements provided by each vendor.
You will need to configure variables/macros within the TMS, define firing rules or triggers for each tag, implement the code in the TMS, and apply the variables and rules to each.
If you ever need help with the configuration of a TMS, let the Tag Inspector team know – we do it all the time. 🙂
The final stage (which really can be done in conjunction with the previous two steps) is the removal of old code from the pages themselves.
You must not forget to remove the old code and do a check to ensure that they are no longer there and firing (a Tag Inspector Scan can come in super handy here, as well, to see how each tag is loading).
If you have two instances of a tag on a page, one firing via the TMS and one still from the page, you run a likely risk of having duplicate data and inflated numbers in your analytics platforms. Never a good thing.
Once the implementation and configuration of the new tags in the TMS and the removal of the old tags is complete, you’re all set up and ready to go! Congratulations!
So wonderful; you are an agile, optimized organization with great tag organization and amazing analytics. It’s now important to keep it that way. Next up, we will cover some strategies for tag monitoring to ensure proper behavior now and into the future.
Check out the preceding parts of our series in the full Tag Management Master guide!


